Okay! So I decided I wanted to try a tutorial, which means LOTS of pictures, and I hope it's easy enough that even non-sewers would feel comfortable giving it a try.
A long time ago, at a birthday far far away, I was given leaf appliques. Wearing leaves on clothes isn't really "me" (or at least it wasn't, I've recently come up with a patch idea that might change all that) so they mostly just sat in my craft supplies for years and years and years. Finally, I got married and all that jazz, and suddenly I looked at those leaves with new light. I decided they would look perfect for an autumn addition to my couches! and so we being.
We're going to start with the appliques and design already on the fabric. It was just an iron on, and it should come with instructions (Peal off, iron on, don't steam.. easy instructions like that) Then I just bought a little bit of fabric paint and free handed the design of branches.
When it comes to sewing, I'm a little unorthodox. I haven't used a pattern with the last half dozen things I've sewn, and the other things I do use a pattern for, I usually alter the pattern as I go. Pretty much I tend to just wing it. So, for this, I measured out how much edging I wanted around my design plus half an inch or so for seam allowance, and put my design square on the edging fabric to measure.
Since my edge material was a plaid-esque design, I was able to just follow the line all the way up.
There's my fabric all the way cut
And then there were two. My fabric ended up being the right length that it fit two sides, as you'll hopefully see.
Now I just pinned down the edge design facing design
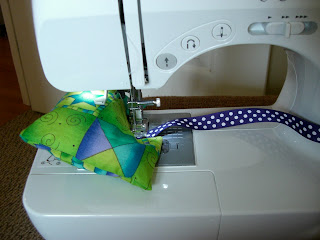
Next, I sewed it. This isn't too scary. Just follow in a straight line, and make sure you take the pins out as you go (you can break the needle if you leave the pins in) When you first start, you want to back stitch (the sewing machine will have this option) to make a 'knot' and back stitch again when you've reached the end.
Then I trimmed the excess, and saved it for later
See? Now I have a nice seam.
And the excess that I cut off will fit perfect for one of the longer sides.
Now I repeated those steps with the second strip I sewed, so now I've got my two opposite sides sewn on.
Next I trimmed the seam (lots of extra fabric on the seam can make it hard to lie flat, and can make sewing through more difficult)
Now I pinned on the remaining two sides..
And all sewn! Loots pretty good, eh?
Now the next thing to do is iron. Being unorthodox, I don't always do this, but since I was making a pillow, this was really my only chance to get all the wrinkles out of my material. (you'll noticed I failed to do that before I added my fabric paint. Oops!)
I just used my front face of my pillow to measure the material I would need for the back. I measured this exactly because the seam allowance on the front will be the same as on the back.
Looks pretty good!
Now I iron out all the creases in the back material
Okay, this is going to seem a little tricky (for beginners) so stick with me. I pinned the front and back together, design facing in.
It's important to leave a gap and DON'T SEW OVER IT! You'll see why.
So here it is, all sewn together, with the gap still there.
Now I trimmed the corners. This is where seams tend to have the most problem, so the less fabric there, the better.
Next, I reached through the hole I left, and grabbed the corner on the inside...
... and pulled it through my hole. Pull all of the fabric until...
... it's right side out! Now that looks like a pillow!
Next I stuffed it with batting (my mom just gave me her extras)
All stuffed. Now I need to sew the hole. This is the tricky part.
You don't want a raw edge, so you need to fold it in, like so.
Both folded in, now you need to pin it.
I use LOTS of pins here, because the fabric likes to unfold itself, and you really don't want the raw edge showing.
Now carefully sew the hole shut, taking out the pins, like before.
and voila! Pillow!
Here are two of them all finished! I didn't have enough batting for the third, so it's still sitting in my craft room. I think they will look splendidly on my couch come September!
(Remember how I didn't post for FOREVER?! Yeah, there is going to be a lot of guess work in this next part)
Time: a few hours. The fabric paint had to dry overnight.
Cost: if you're buying it all, I'd guess between $20 and $30.


